Old Fashioned Easter Egg Dye
Knowing how to make old fashioned Easter Egg dye is part of the Easter tradition that every child should experience. Grandma's DIY Easter Egg dye recipes call for all-natural ingredients, and the unique colors are very easy to make.
Above all, it's fun to involve the entire family in decorating Easter Eggs the old fashioned way. It's a traditional way to welcome the festival of Easter and celebrate family togetherness and love.
What follows is a handy guide to dyeing Easter Eggs naturally featuring step by step instructions and decorating tips to help you enjoy a memorable time with your family.
How to Prepare Your Eggs for Old Fashioned Easter Egg Dye
 Children Learning How to Dye Easter Eggs
(Source: ©iStock/hallgerd)
Coloring eggs using old fashioned Easter Egg dye is so much easier when the eggs are properly prepared. There are three ways that you can prepare eggs for painting or dyeing:
- You can use fresh raw eggs
- You can hard boil the eggs.
- You can blow an egg to remove its contents
How to choose a method?
A dyed fresh raw egg will not last long and will create a mess if broken; a hard boiled egg lasts longer, and if all-natural old fashioned Easter Egg dyes are used, it can be eaten later; but a blown egg that's dyed and decorated can last as a keepsake for many years.
It's important to note that a hard boiled egg is much less fragile and easier for young kids to handle when they are learning how to color their eggs.
White or Brown Eggs
White eggs will give the best results if you're looking for variety and intensity of color, whereas brown eggs lead to murkier darker colors, and you'll less likely to achieve the primary colors.
Prepare at least a dozen eggs ahead of time; that way, you'll have plenty if some happen to break or the colors turn out less than expected.
Plastic Eggs
I would be remiss not to mention that artificial plastic eggs are available in stores and for purchase online at Amazon. They can offer an alternative for younger children when breakage is an issue, though you cannot expect to achieve the same results as you would with natural eggs when using old fashioned Easter Egg dye.
Before You Begin
Aside from your prepared eggs, you'll need a clean work area, and a slotted spoon to place eggs into the dye solutions. You can use a regular spoon to lift the eggs, but the slotted kind works much better, as it's less messy.
You'll also need a few cups or containers to hold the various colors of old fashioned Easter Egg dye for dipping the eggs into.
As for any mess, decide before you begin that you'll clean it up together and don't worry about it. Even the cleanup can be fun for the family when it's handled right.
How to Hard Boil Eggs for Dyeing
 Prepare Hard Boil Eggs for Decorating
(Source: ©pilcas/Depositphotos.com)
Refrigerate your colored eggs within 2 hours after they have been hard boiled. DO NOT EAT eggs that have been left out at room temperature for over 2 hours! Be safe with eggs!
If you prefer to use hard boiled eggs, then you'll need to plan ahead to avoid the disappointment of running out of time. Allow at least 90 minutes to boil and prepare the eggs by following the easy steps given.
Be careful NOT to cook your eggs by placing them in water that's already boiling hot. The temperature difference makes it almost certain that the shells will crack! Instead, place the desired number of eggs (and several extras) into cold or lukewarm water and put the pot on the stove. The water should just cover the eggs.
Adding a tablespoon of vinegar to the water will allow the old fashioned Easter Egg dye to soak into the shell better, covering it more evenly and thoroughly, making some natural colors brighter.
If vinegar is unavailable, you can substitute an equal amount of lemon juice or lime juice to obtain the same results.
Alternatively, avoid adding vinegar or lemon or lime juice if you prefer the shell to have a light pastel color.
As the water heats, the inside of the egg heats gradually, hardening the contents. Edible eggs can be done in as little as five minutes.
However, eggs meant for decorating should be given a few minutes extra, making them extra firm; that way, the boiled eggs will stand up well to handling. However, don't overcook them, since that can also lead to their shells cracking.
Once the eggs are boiled, turn off the heat and allow the pot to cool gradually until both the water and eggs are almost at room temperature. This may take around 15 to 20 minutes.
Now, remove the eggs carefully from the pot and place them gently into a bowl of ice water or cold water from the tap. Place the bowl into the refrigerator and let them cool and harden further for at least 40 minutes.
Then, remove the bowl from the refrigerator and let the eggs sit for about 10 minutes to reach room temperature again. Now they're ready for decorating.
Applying the old fashioned Easter Egg dye is made easier when the eggs are properly prepared ahead of time.
How to Blow an Egg for Dyeing
Blowing an egg to empty its contents without breaking the delicate shells is not the easiest of tasks, but it is fun to do, and it does get easier with a bit of practice. It's consistent with learning how to dye Easter Eggs the old fashioned way.
To prepare for egg blowing, poke a small hole on one end of the raw egg and a slightly larger hole on the other end with a needle. Then, while holding the egg over a bowl, blow through the small hole, so that the contents can run out of the larger one.
Before starting to blow, pierce the yolk with the needle to help things along and expect to blow harder to get the flow started. It's similar to blowing up a balloon.
You could end up with lots of mixed yolk and egg white depending on how many eggs you plan to decorate, so plan ahead to use the contents of the eggs to bake an Easter cake or Easter cookies or omelets or whatever else you would like to make.
Once you've removed the contents of the eggs from the shells, gently rinse the shells thoroughly with clean cold water in preparation for the old fashioned Easter Egg dye.
When the egg blowing is done and the shells have dried, have your children sit down to color and decorate the empty egg shells for Easter.
How to Color Eggs With Old Fashioned Easter Egg Dye
 Spinach and Beets Make Natural Dyes for Easter Eggs
(Source: ©martahlushyk1/Depositphotos.com)
Grandma's Tip
Here's a simple idea for making shiny Easter Eggs. Rub them lightly with vegetable oil once the dye is dry.
Mom taught me to color Easter eggs naturally using Grandma's old fashioned Easter Egg dye. Unlike most chemical dyes, these all-natural dyes are 100% safe, all-natural, non allergenic, inexpensive, and they really do work.
Plus, it's fun and educational too. Your kids will discover that different fruits and vegetables produce different colors. The variety of pastel and vibrant colors will amaze.
What's more, you can safely eat naturally dyed eggs that have been hard boiled and properly refrigerated! Some natural dye liquids might take an hour or more to color the hard-boiled eggs, so allow the coloring process to take place INSIDE the refrigerator should you wish to eat the eggs later.
An hour of waiting to see the results will seem a long time to a child. Developing patience is another benefit to learning how to dye Easter Eggs.
Below is a list of old fashioned Easter Egg dyes.
Coloring Eggs With Vegetable and Fruit Dye
 Naturally Dyed Easter Eggs in Pastel Colors
(Source: ©dmitriy.ozhgihin/Depositphotos.com)
The following vegetables and fruits may be used to make old fashioned Easter Egg dye:
- Carrots
- Cranberries
- Beets
- Blueberries
- Grape Juice
- Red Cabbage
- Hibiscus Petals
- Spinach
Add the chosen chopped vegetable or fruit to 3/4 cup cool water in a pot with 1/2 teaspoon of vinegar, bring to a boil and allow to simmer until the water turns a pleasing color. You will find that each fruit and vegetable will produce its own distinctive color.
Remove from the heat, let cool, and then strain the colored water into a cup. Place a hard-boiled egg into the cup and let it sit in the colored liquid until it reaches the desired shade, this may take up to an hour and is best done in the refrigerator when the egg is to be eaten later.
Coloring Easter Eggs naturally takes time, but the beautiful results more than make up for the time you spend waiting.
Coloring Eggs With Spice Dye
The following spices may be used to make old fashioned Easter Egg dye:
- Cayenne Pepper
- Tumeric
- Chili Powder
Pour 2 cups of water in a small glass bowl having first warmed the water, add and 2 teaspoons white vinegar, then stir in 3 tablespoons of the chosen spice.
Place a hard-boiled egg into the bowl and let it sit until it reaches the desired shade.
Coloring Eggs With Tea
Pour 1 cup boiling water over 3 tea bags in a small pot and allow to steep for about 15 minutes. Pour the liquid into a small bowl, add 2 teaspoons of white vinegar and let cool.
Let a hard-boiled egg sit in the tea-colored liquid until it reaches the desired shade of color, this may take up to an hour. Different teas will produce different shades of color.
Coloring Eggs With Coffee
Prepare 1 cup of strong coffee, add 2 teaspoons white vinegar and let cool. Let a hard-boiled egg sit in the coffee liquid until it reaches the desired shade of color, this may take up to an hour.
Coloring Eggs With Onion Skins
 Colorful Onion Skin Dyed Easter Egg
(Source: ©iStock/gi8)
Learning how to dye Easter Eggs the old fashioned way by using yellow onion skins is something everyone should try. Prepare to be amazed at the beautiful results you'll achieve with this old fashioned Easter Egg dye!
Remove the red or yellow-brown outer skin from an onion and wrap it around a RAW egg securing it by wrapping with twine, string, or thread.
Gently hard boil the egg WITHOUT vinegar and afterwards remove the onion skin to reveal a golden-toned, multicolored egg as pictured above.
Note: Red cabbage leaves can be used in the same manner as onion skins to produce a distinctive pinkish-red shade of color.
Coloring Eggs With Leaves and Flowers
 Coloring Eggs for Easter Using Leaves and Flowers
(Source: ©kataklinger/Depositphoto.com)
Enjoy an outdoor walk in the Spring with your family to collect leaves and flowers that are small enough to lay on the surface of an egg.
Then, cut some old pantyhose into 5-inch strips. First dip the hard boiled egg in water to dampen it, then carefully position a leaf or flower on its surface. Several leaves or flowers can be arranged in a pattern if desired.
Place the egg on a piece of old pantyhose and pull the material tightly while keeping everything in place, then secure it with a piece of string.
Now, naturally color the egg using an old fashioned Easter Egg dye of your choice, and the shapes of the leaves will leave pleasing patterns on the colored shell.
This method of decorating Easter Eggs can be finicky, and it takes practice, but it often produces results that are totally unique and exquisitely detailed.
How to Dye Easter Eggs With Food Coloring
 Young Girl Coloring Easter Eggs Usng Food Dyes
(Source: ©rich-legg/iStock.com)
Making eggs a solid color with liquid food coloring is both easy and inexpensive. To prepare the artificial dye solution, just add about 25 drops of regular food coloring to 1/2 cup warm water, or enough water to cover the egg when placed in the cup. A gel food coloring may also be used.
Place the egg into a the cup with the drops of food coloring and let it sit for a few minutes in the dye bath until it reaches the desired color shade. Remove egg and allow to dry on a paper towel.
If you set the colored eggs on a cloth or tea towel to dry, don't expect to get it clean again in the washing machine because of the artificial colors, so use a paper towel instead.
Two-Tone Eggs
To make two-tone eggs, dip one end into one cup for a few minutes to color part of the egg. Allow to dry, then dip the other end into a cup containing the second color.
Three-Tone Eggs
A three-tone egg can be had by simply dipping the ends in different colors leaving the middle of the egg white.
Write a Name on the Egg
Use wax crayons to write a name on the egg and then color as usual. After the coloring has dried, the crayon can be carefully wiped off if the eggs are warmed slightly in the oven leaving the name visible.
Multicolored Egg
Using colorful stickers, rubber bands, or small bits of masking tape, you can mask off and apply several colors to a single egg.
Simply apply the chosen masking bits and then color as usual. When the coloring has dried, remove one or more masking bits and place the egg in another color and repeat the process.
However, it can get tricky when you try to do more than three colors. Beyond that, hand painting with watercolors might be the best way to go.
Marble Colored Eggs
Here's how to color eggs with a unique marble effect, and it's easy to do. Simply mix a tiny bit of vegetable oil into the coloring. Then, the food dye sticks in a marbleized pattern to make outstanding looking Easter Eggs.
Mottled Colored Eggs
A way to achieve a unique mottled color effect is to spray any brand of shaving cream onto a sheet of waxed paper. Next, shake drops of 2 or 3 different liquid food colors into the shaving cream and using the handle end of a spoon, swirl the colors together, but don't mix them completely. Leave a swirl of color.
Next, roll your hard boiled egg into the colored shaving cream and then set it aside until it dries.
Once the shaving cream has dried, carefully rinse the egg off under running cold water and very gently pat dry with a paper towel.
Note: if shaving cream is unavailable, whipped cream or Cool Whip® topping may also be used in the same manner.
How to Dye Easter Eggs With Watercolors
 Coloring Easter Eggs with Water Colors
(Source: ©iStock/hallgerd)
NEVER EAT EGGS once they have been colored with a watercolor paint, as the non-edible paint will absorb into the egg itself.
Easter Egg painting with watercolor paint is one creative way to color the eggs with any design you want.
The
watercolor paints will soak into the shell quite well, and it may take
several coats to get an even appearance, if that's desired. Use a fine
watercolor brush or pens for convenience.
Store-Bought Easter Egg Decorating Kits
 Coloring Easter Eggs with Food Dyes
(PD Source: Don Bell)
Easter Egg dye kits can offer a convenient way to dye your eggs. Most kits for children contain a simple wire egg holder, multiple dye tabs in a variety of colors, stencils, adhesive stickers, and other decorating aids.
Instructions on How to Color Easter Eggs are often in the kit. You can find kits available for sale at most local stores around Easter time.
Using Old Fashioned Easter Egg Dye Is The Best Method of All
Although commercial egg decorating kits started to become popular when I was a child back in the 1950s, I had THE MOST FUN learning how to color Easter Eggs by experimenting with Grandma's old fashioned Easter Egg dye using onion skins and colors derived from vegetables and fruits.
If your kids enjoy experimenting, and most do, then you'll find that they will love the old fashioned methods too. It seems almost magical when such unique colors of the rainbow are produced from ordinary foods found in the kitchen.
Let creativity run wild. You'll find that there is far more joy in decorating Easter Eggs Grandma's using methods than in purchasing ready-made Easter Egg kits at the local craft store.
Your children's Easter Egg decorations can be proudly displayed in small Easter baskets, or narrow strips of colored paper can be decorated and their ends taped together in a ring to form attractive Easter Egg holders.
The beautiful Easter Eggs in their all-natural colors can first be hidden for an Easter Egg hunt and afterwards made available for a special Easter breakfast.
Learning how to make old fashioned Easter Egg dye and making their own Easter decorations will become a fun activity, and it will create fond memories of their childhood to share in turn with their own children.

Get secure instant access to your FREE PDF COPY of the vintage "Baby Chick Easter Toy" that you can download and print out on your color printer for your kids to enjoy.
You Might Like These
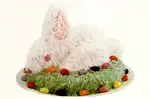
Vintage Easter Bunny Cake Recipes With Step by Step Instructions
Get Grandma's vintage Easter Bunny Cake recipes and make a delightful 3-layer or 3D cake for Easter, or adapt them for birthdays and other special occasions.
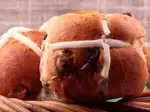
Grandma's Traditional Hot Cross Buns Recipe - Homemade Delicious
Get Grandma's traditional hot cross buns recipe. These delicious homemade sweet buns are a favorite Easter treat at our house, and now you can enjoy them too.
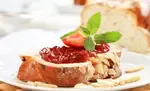
Old Fashioned Chocolate Easter Eggs - How to Make Candy Eggs
Get recipes for Grandma's old fashioned chocolate Easter Eggs. Enjoy making a variety of homemade chocolate coated eggs with delicious fillings.


Sign Up now for GRANDMA'S DESSERT CLUB and download your FREE PDF COPY of Grandma McIlmoyle's Little Dessert Book. Also receive my regular Bulletin featuring classic recipes and nostalgia.

Hi! I'm Don Bell, and I love sharing Grandma's heritage dessert recipes, and the nostalgia they bring to mind. Have fun making all your favorite desserts from childhood.

SCAN and have access to Grandma's Recipes on your CELLPHONE
Readers are saying…
I just briefly want to say thanks for publishing such a warm, cozy site that just feels like, well, home. —Dusty, U.S.A.
This website is extraordinary to people my age who remember their pasts fondly and miss all those who have gone before.
Your Grandma's homemade dessert recipes add greatly to those memories, and I wanted to tell you that your efforts here are very special indeed. —Maureen, Canada
You have a great site! So homey with precious recipes. —Miriam, USA
Homemade-Dessert-Recipes.com does not sell any personal information. This site uses cookies for its operation and to enhance your experience. Privacy Policy
Copyright © 2004–2025 by Don Bell, D.R. Bell
All Rights Reserved Worldwide.