Chinese Bakery Style Cake Recipe
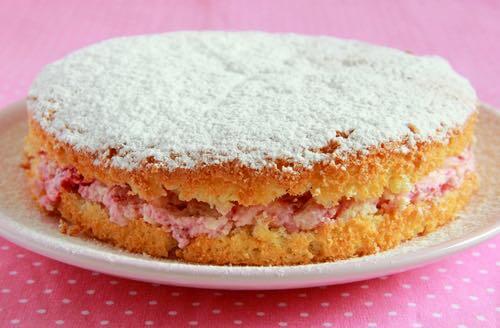
This is a Chinese bakery style cake recipe that you will really want to try. It makes an easy to assemble three layer sponge cake combining whipped cream, creamy custard, chocolate mousse, and fresh fruit into an unbelievably light-tasting colorful cake.
Just be aware that the rich flavor and texture of this amazing bakery-style dessert cake will leave people begging for seconds!
Chinese Bakery Style Cake Recipe
 Chinese Sponge Cake Decorated with Fresh Strawberries
(Source: DIYplr)
Ingredients
1 package vanilla OR better yet, chocolate mousse†
1 package of vanilla custard
One already baked Sponge Cake
Fruit of choice, cut into small pieces††
2 cups of whipped cream for filling
1 cup of whipped cream for decorating
† Many Chinese bakery style cake recipes feature vanilla mousse and vanilla custard filling, but for this decadent homemade version, we're substituting a delicious chocolate mousse.
†† For this recipe, we are using strawberry, cantaloupe, and mango, but you can include peaches, cherries, other berries, canned mandarins, and more.
Advance Preparation
Prepare your custard and your chocolate mousse in advance according to the package decorations, then cover the bowls with wax paper and place them in the refrigerator for several hours to set.
Bake your homemade sponge cake beforehand to give it enough time to cool completely. You can either use a cake mix or make one of Grandma's classic sponge cakes from scratch.
 Prepare Freshly Chopped Fruit for Cake Layers
(Source: DIYplr)
Prepare your fruit by cutting it into small pieces. You'll need enough fruit to cover 2 layers of your cake, plus enough to decorate the top.
If fruit is out of season and you need to use the frozen variety, allow it to thaw and then drain any excess liquid before you place it between the cake layers.
 Beating the Whipped Cream
(Source: DIYplr)
Prepare the whipped cream for your cake close to the time when you plan to assemble it. To keep your whipped cream stable for a longer time, try our stabilized whipped cream recipe.
Because the stabilized whipped cream is firmer, it's easier to decorate with, and it holds its shape longer for a beautiful cake.
How to Assemble Your Cake Layers
This fancy dessert cake is bound to taste light and delicious no matter how you choose to assemble it; however, here's the traditional method called for in this Chinese bakery style cake recipe:
Begin by cutting your cake twice to create 3 equal layers. Cut your layers using a bread knife, a cake leveler, or a thread the way Grandma used to do it. You need to end up with 3 flat layers that are as even in thickness as possible.
First, spread a layer of chocolate mousse over the bottom layer, and add a layer of chopped fruit as shown below.
 Add the Cake's Bottom Layer with Mousse and Fruit
(Source: DIYplr)
Next, add the middle layer of cake, spreading it with custard, and some more fruit as shown below.
 Add the Cake's Middle Layer with Custard and Fruit
(Source: DIYplr)
Finally, very carefully add the top layer on the cake. If it becomes slightly lopsided, you can adjust for this when you add the whipped cream topping. Your cake topping might be a little thicker on one side, but nobody will complain.
 Assembled 3-Layer Chinese Sponge Cake
(Source: DIYplr)
Hint: To prevent your assembled cake from becoming too lopsided, try piping a thick circle of whipped cream around the edges of the bottom and middle layers before you add the fillings.
Then spread the creamy custard and fruit evenly inside the circle of whipped cream.
Cover Cake with Whipped Cream
 Chinese Sponge Cake Iced with Whipped Cream
(Source: DIYplr)
Your final step is to ice your Chinese Sponge Cake with the whipped cream (see above). Use a spatula to spread whipped cream smoothly on the top and then around the sides, until the entire cake is completely covered.
Wipe any excess whipped cream from your cake board using a clean cloth.
For smooth overall icing results, a decorating turntable comes in handy. It's well worth investing in one if you plan on decorating many cakes.
How to Decorate a Chinese Sponge Cake
Feel free to decorate your cake in whatever way you prefer, but for this Chinese Bakery Style Cake recipe, we recommend a simple traditional decoration of whipped cream swirls, generously topped with fruit arranged in a decorative manner.
Enjoy taking pride when serving your delicious creation. Get ready for the many compliments you're sure to receive.
You Might Like These
Royal Cake Recipes to Honor Members of The Royal Family
Get old fashioned royal cake recipes for making delicious dessert cakes that honor Great Britain's Royal Family from the Victorian Era to more recent times.
Vintage Cake Recipes - Make Fancy Cakes for Any Occasion
Get Grandma's vintage cake recipes and enjoy serving homemade cakes proven to be delicious. Everybody loves them, and they're spectacular looking to serve.
Old Fashioned Lemon Cake Recipes - All Grandma's Favorites
Get Grandma's old fashioned lemon cake recipes and make delicious homemade cakes that are naturally flavoured with the fresh, zesty taste of real lemons.


Sign Up now for GRANDMA'S DESSERT CLUB and download your FREE PDF COPY of Grandma McIlmoyle's Little Dessert Book. Also receive my regular Bulletin featuring classic recipes and nostalgia.

Hi! I'm Don Bell, and I love sharing Grandma's best dessert recipes, and the nostalgia they bring to mind. Have fun making all your favorite desserts from childhood.

SCAN and have access to Grandma's Recipes on your CELLPHONE
I just briefly want to say thanks for publishing such a warm, cozy site that just feels like, well, home. —Dusty, U.S.A.
This website is extraordinary to people my age who remember their pasts fondly and miss all those who have gone before.
Your Grandma's homemade dessert recipes add greatly to those memories, and I wanted to tell you that your efforts here are very special indeed. —Maureen, Canada
You have a great site! So homey with precious recipes. —Miriam, USA
"And if you bring as an offering a grain offering baked in the oven, it shall be unleavened cakes of fine flour mixed with oil" (Leviticus 2:4) — the first donuts?
Homemade-Dessert-Recipes.com does not sell any personal information. This site uses cookies for its operation and to enhance your experience. Privacy Policy
Copyright © 2004-2025 by Don Bell, DR Bell, D.R. Bell
All Rights Reserved Worldwide.