- Home
- Ice Cream Recipes
- Make Homemade Ice Cream
How to Make Homemade Ice Cream
Learn how to make homemade ice cream with or without an ice cream machine. It's surprisingly easy once you know the steps. By following Grandma's old fashioned methods, you'll always be able to make ice creams that are creamy, smooth, and delicious.
There's a rewarding satisfaction that comes when you first taste your own ice cream. You can't beat its premium, all-natural taste. And your family and friends will love it too!
How to Make Homemade Ice Cream In Your Kitchen
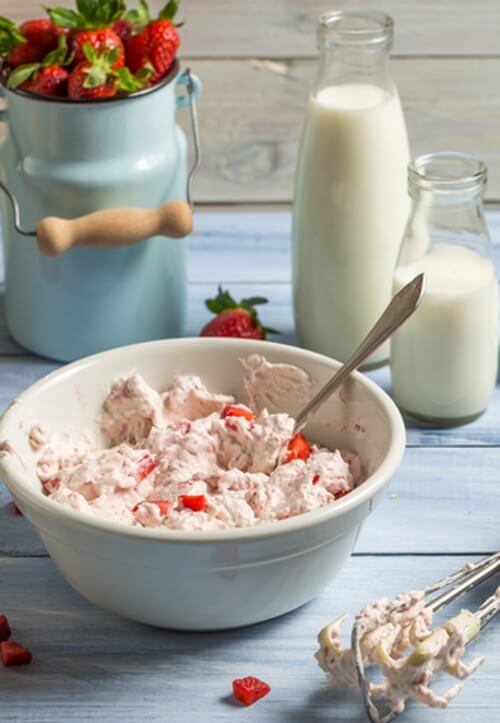 Ingredients for Making Strawberry Ice Cream at Home
(Source: ©Shaiith79/Depositphotos.com)
There's no need to buy expensive ice cream makers. You can save money by knowing how to make homemade ice cream whenever you want simply by using your refrigerator freezer.
However, if you do have a machine, so much the better. There are two basic types of ice cream makers: the traditional type with a hand crank, and the now-common electric ice cream maker.
Both types make excellent frozen desserts so choose the one that suits you best and follow the simple steps given below to make your own frozen treats at home in your kitchen.
Once you know how to make homemade ice cream, you'll be pleasantly surprised at how good it turns out. Believe me, it will taste so much better than any store-bought variety. And, you'll have the added satisfaction of always knowing how to make it yourself.
Simply follow the easy steps. Remember, you get to control the sweetness and flavor; that means your homemade ice cream will be so much healthier than any brand-name variety. And if you have the ingredients, you can begin right now.
How to Make Homemade Ice Cream WITHOUT a Machine
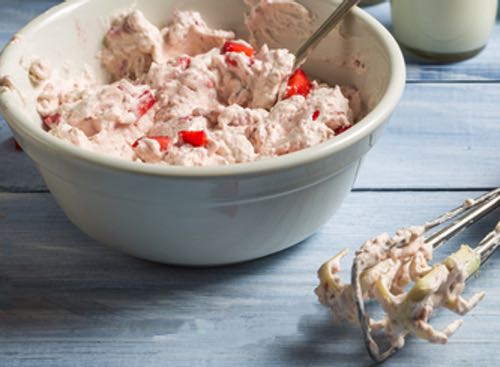 How to Make Homemade Ice Cream In the Refrigerator
(Source: ©Shaiith79/Depositphotos.com)
The easiest and most affordable way of learning how to make homemade ice cream is with your refrigerator freezer. Some people even claim it's the best way to make ice cream.
The following 3-step method is easy, and it doesn't require much time or effort.
Step 1.
Simply follow the ice cream recipe to prepare the mixture, then sample it and adjust the ingredients to your own taste. Any recipe can be used when learning how to make homemade ice cream; however, Grandma's old fashioned ice cream recipes are wonderful for this purpose.
Step 2.
When you are satisfied with the mixture's taste, and it's ready to freeze, pour it into a freezer container and seal it with the container's lid. If your container doesn't have a lid, then carefully seal it tightly with aluminum foil.
After you learn how to make homemade ice cream and have made a few quantities, you'll find that shallow freezer containers or cake pans work best as they allow the mixture to freeze quickly. Here are some tips on how to use them:
- If the mixture contains whipped ingredients, then immediately place the sealed container into the freezer.
- If the mixture contains ingredients that are not whipped, first place the sealed container in the refrigerator compartment for 20 minutes or so to chill, and then place it in the freezer to freeze.
- If the mixture has been cooked, it may need to sit in the refrigerator for several hours to chill thoroughly before placing it in the freezer to freeze.
Step 3.
After the mixture has been sitting in the freezer for 20 minutes or so, take it out, and if it has been in there long enough you should notice a thick layer of ice crystals coating the inside of the container.
Unseal the container and using a wooden spoon or spatula, scrape the ice crystals that have formed on the sides into the center, and then beat the mixture thoroughly to prevent the further formation of ice crystals and to lighten it with air.
The tiny pockets of air beaten into the ice cream make it smooth and easy to scoop. Ice cream without beating is similar to bread that has not risen. Therefore, it requires beating to be creamy smooth!
Try to not let the semi-frozen mixture melt too much while beating. An electric hand-held beater can be used to great advantage and it will make this step much easier.
Reseal the container and return it to the freezer. Leave it for another 30 minutes or so and then repeat the scraping and beating process. If the mixture freezes too hard, simply place it in the refrigerator compartment until it is again just soft enough to beat. This is common practice when you make your own ices.
Depending on the ingredients used and the temperature of your freezer, you may have to repeat this step up to three or four times until the mixture is creamy smooth in texture, but firmly frozen.
After the last beating, you may pack the ice cream in molds for freezing or simply reseal the container and return it to the freezer.
Helpful Tips
Ice cream has fewer ice crystals and a smoother texture when it freezes quickly. So to hasten the freezing, first chill the major ingredients in the refrigerator and freeze the empty freezer container in the freezer compartment before you begin to mix the ingredients.
Finally, after you place the sealed container containing the ice cream mixture in the freezer, surround it with other frozen food items to hasten the freezing process.
How to Make Homemade Ice Cream WITH a Machine
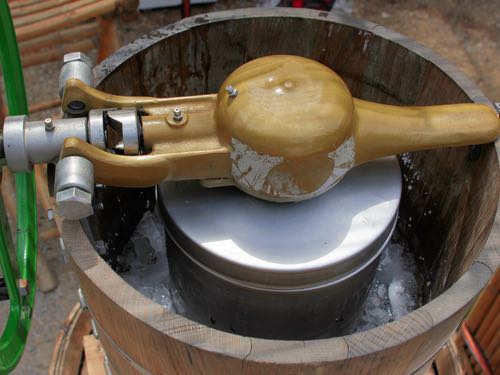 How to Make Ice Cream With an Ice Cream Freezer
(Source: ©sunworld/Depositphotos.com)
Learning how to make homemade ice cream with an automatic, electric ice cream maker is simply a matter of following the simple instructions that came with the appliance, and adapting the frozen custard recipes for the quantities needed.
So, since this is after all an old time recipe site, let's now concentrate on the traditional hand-crank ice cream churns:
How to Prepare the Ice Cream Mixture
Carefully follow your recipe to prepare the ice cream mixture, then set the mixture in the refrigerator for an hour to ripen and chill, unless the recipe specifies otherwise.
Mixtures for frozen custard recipes may require considerable time to chill, and it's sometimes best to make them the night before and let them chill in the refrigerator. While waiting for the mixture to finish chilling, you can prepare the ice and salt.
How to Prepare the Ice and Salt
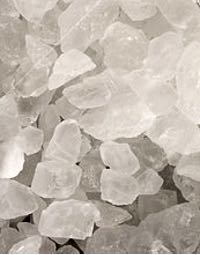 Rock Salt Crystals
Grandma's old fashioned method of making homemade ice cream calls for a quantity of ice and rock salt. The rock salt will melt the ice surrounding the canister creating a brine solution which absorbs the heat from the mixture allowing it to begin to freeze.
Without the ice and salt present, you would not be able to make frozen desserts.
Here's why: If there were no salt added to the ice, it would melt at 32°F (0°C), the melting point for freshwater ice, which is not cold enough to make ice cream.
Salt speeds the melting of the ice and lowers the temperature to the melting point of saltwater ice, approximately 29°F (-2°C), depending on the saltiness. The lower melting temperature is necessary for the mixture to freeze.
Rock salt, sometimes called ice-cream salt, is available for sale at most hardware stores. The coarse salt sold for use in water softeners also works quite well and is inexpensive.
You can also use coarse sidewalk salt, but be careful as some brands often contain harmful chemicals. Ordinary table salt may be substituted in a pinch, but it is more expensive to use and doesn't perform nearly as well as the coarser salts.
You can purchase ice by the block at many convenience stores, or you can freeze small containers of water in your home freezer. Empty yoghurt containers work quite well for this, or you can build up a large stockpile of ice cubes.
Place the ice block in a heavy cloth bag and hit it repeatedly with a hammer to break it into small pieces. Afterwards, dump the ice pieces into a non-metal container and mix it with the salt.
Some find it handy to have a small, shallow wooden box made to prepare the salt and ice in. The wooden box may be kept handy for whenever you need it.
When you go to make ice cream, set the quantity of ice you will need for the freezing process in the clean box and use an ice pick and a hammer to break the ice into small enough pieces.
After the ice is all broken up, take about one-third as much rock salt, as there is ice, and pour the rock salt into the box over the ice. Use a small plastic garden trowel or some other non-metal utensil to mix the ice and salt thoroughly together.
It's always a good idea to use a plastic drop sheet to protect the floor or working surface from spilled saltwater — salt is corrosive. Some prefer to wear rubber gloves when handling rock salt.
How to Use a Hand Crank Freezer
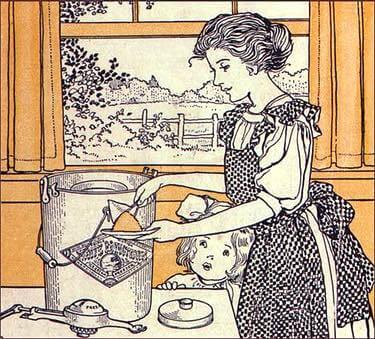 Using a Hand Crank Ice Cream Freezer
(Source: White Mountain Handbook c.1920s)
Learning how to make homemade ice cream using a hand crank machine is straightforward and easy once you know how. First, pack the prepared ice and salt into the space between the freezer canister and the tub by using a wooden stick or spoon to tamp it down tight.
Do not use metal utensils, as the salt will ruin them. Let everything sit for 5 minutes to allow the freezer canister to become icy cold.
When you're ready to freeze the ice cream or water ice mixture, pour it into the freezer canister until it is about 1/2 to 3/4 full. Never fill the can too full. Always leave room for the mixture to move about and expand.
Next, confirm that the blend of ice and salt in the tub is packed slightly above the mixture's level in the can, then carefully install the paddle mechanism and tightly seal the lid to prevent any saltwater from seeping in and spoiling the ice cream taste.
When learning how to make homemade ice cream with a hand-cranked freezer, it's recommended that you let the freezer sit for 2 minutes or so before trying to turn the crank. When the ingredients chill to the point that you can feel a slight resistance, you are ready to begin cranking the freezer.
Crank slowly first, but then maintain a steady pace until you can feel the cream stiffening and the turning getting tougher. It may take from 20 to 30 minutes depending on the ice-salt blend and the type of ingredients you are freezing. If it doesn't seem cold enough after 10 minutes of cranking, just add a bit more salt and ice to the tub.
As you learn how to make ice cream, experience will teach you how much salt to use. Too much salt will cause the cream to freeze too quickly, and it will have a coarser texture from not being stirred enough. But, if it freezes too slowly, it will have a buttery texture from being stirred too much.
Don't worry, you'll soon get the hang of it and make ice cream that has a perfect texture and flavor. In any event, its texture is bound to be superior to any store-bought variety.
How to "Pack" the Frozen Ice Cream
When the mixture reaches the firm texture of "soft ice cream," it is ready to pack in a freezer container. You can tell when it reaches this stage since it becomes very difficult to turn the crank. Continuing to crank beyond this stage is needless, as it will not improve its quality.
Before opening the canister, wipe the top of the container with a clean, dry towel to remove any traces of saltwater, then carefully remove the lid and paddles. Use a wooden spoon to scrape the frozen ice cream off the sides of the container into the center.
Depending which recipe you are using, this is the time to mix in any fruit, nuts, chocolate chips, or jams, and the like, but make sure that any solid ingredients are finely chopped. Large pieces of frozen fruit are too difficult to eat and lack flavor.
Pack the ice cream in a sealable freezer container or in a mold for freezing. Verify that the lid is tightly secured, and then place the container or mold in the kitchen freezer for at least an hour or two while the ice cream finishes freezing and ripening.
Or, if you prefer learning how to make homemade ice cream by strictly following the old fashioned method, pack down the ice cream in the canister, verify the lid is clean and free from salt, and then tightly reseal the canister. Drain the liquid brine and repack the bucket with more ice and salt.
Cover the freezer with a heavy blanket or scatter rug and leave it to sit for at least an hour while the ice cream finishes freezing and ripening. The "ripening" time will improve the flavor.
Knowing How to Make Homemade Ice Cream Results In the Best Taste
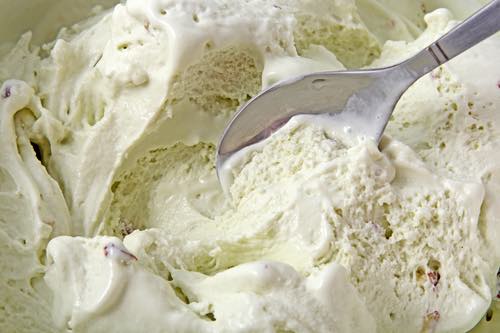 Enjoy the Fresh Flavor of Homemade Ice Cream
(Source: ©aluha123/Depositphotos.com)
Many food purists claim that learning to make homemade ice cream the old fashioned way is the only way to obtain the unique texture and superior taste of homemade ice creams.
The hand cranking gives ice cream a unique consistency, and the fresh, all-natural ingredients give it a superior flavor compared to other methods of ice cream making.
Truly, it's the best ice cream that you can ever hope to taste! And by knowing how to make it yourself, you'll be able to indulge your taste cravings anytime.
The steps in learning how to make homemade ice cream using a modern hand-crank machine is the same as that used with an antique ice cream churn. And here's the best news:
Modern hand-crank ice cream freezers similar the one Grandma used can still be purchased at select hardware stores, and they are available online at Amazon. You can easily order yours today!
The History of Ice Cream Freezers
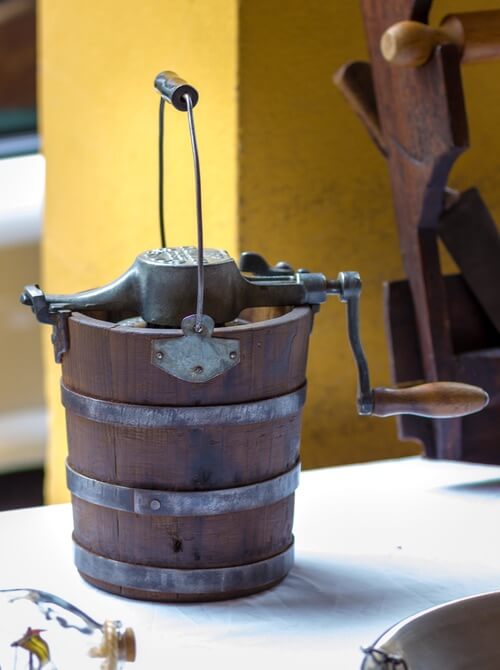 Hand-Crank Freezer to Make Homemade Ice Cream
(Source: ©fpwing/Depositphotos.com)
Tired of the time and effort involved in making ice cream by hand in an old-style sarbotiere pot freezer, Nancy Johnson, a New England housewife, invented the first mechanical ice cream churn in 1843.
Powered by a hand crank, her brainchild featured an "S"-shaped dasher that efficiently scraped the sides of the pot as it revolved to prevent ice crystals from forming.
Compared to the sarbotiere, Johnson's froze the mixture faster and with much less effort. It was a clever idea, and its basic design is still being used.
Amazingly, Johnson sold the rights to her invention for $200 to William G. Young, a Philadelphia wholesaler. He must have been a decent fellow for he generously acknowledged Nancy by naming his new acquisition the "Johnson Patent Ice-Cream Freezer" when he patented it on May 30, 1848.
Young manufactured and marketed "Johnson freezers" at the affordable price of $3 each.
The mechanical churn quickly captured the public's attention and brought ice cream making to a much wider segment of the population.
These new appliances were not only used in homes, but they were also used in small confectionery shops and restaurants to make freshly frozen ices faster and more affordable. Then as now, time meant money.
Soon, many companies became involved in manufacturing hand-cranked freezers patterned after Nancy Johnson's and numerous patents were issued as entrepreneurs worked to improve the basic design.
And now today, you can learn how to make homemade ice cream in your own kitchen thanks to Nancy Johnson's practical invention.

Sign Up now for GRANDMA'S DESSERT CLUB and download your FREE PDF COPY of Grandma McIlmoyle's Little Dessert Book. Also receive my regular Bulletin featuring classic recipes and nostalgia.


